
For Harddisk Drives
1. Open the Start menu.
2. Click on the Computer button. (See screenshot below)

3. In the computer window, right click on the drive and click Rename. (See screenshot below)

4. Type in a name you want to be displayed for the drive and press enter. (See screenshot below)

5. Click on continue in the Access Denied prompt. (See screenshot below)

6. Click on Continue in the UAC prompt.
7. When done, close the Computer window.
METHOD TWO: |
For Devices with Removable Storage |
1. Open the Start Menu.
2. In the white line (Start Search) area, type regedit and press Enter.
3. Click on Continue button in the UAC prompt.
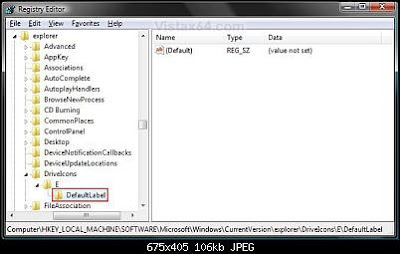
4. In regedit, go to: (See screenshot below step 5)
HKEY_LOCAL_MACHINE\SOFTWARE\Microsoft\Windows\CurrentVersion\explorer5. In the left pane, right click on explorer.exe and click on New and Key.

6. Type DriveIcons and press Enter. (See screenshot below)
7. In the left pane, right click on DriveIcons and click on New and Key.

8. Type the drive letter (EX: E) you want to change the drive name for and press Enter. (See screenshot below)
9. In the left pane, right click on the drive letter (EX: E) and click on New and Key.

10. Type DefaultLabel and press Enter. (See screenshot below)
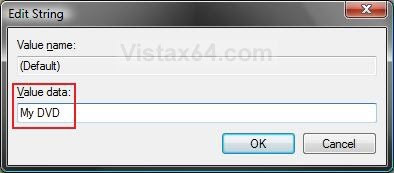
11. In the right pane, right click on (Default) and click on Modify.
11. In the right pane, right click on (Default) and click on Modify.

12. To Change the Drive Name -
A) Type in a name (Ex: My DVD) and click OK. (See screenshot below step 13)
B) Go to step 14.
13. To Restore the Default Drive Name -
A) Leave this empty and click OK. (See screenshot below)
B) Go to step 15.
A) Type in a name (Ex: My DVD) and click OK. (See screenshot below step 13)
B) Go to step 14.
13. To Restore the Default Drive Name -
A) Leave this empty and click OK. (See screenshot below)
B) Go to step 15.

14. The registry should look similar to this now. (See screenshot below)


15. Repeat steps 9 to 14 if you want to add another drive letter icon to change.
16. Close regedit.